Java is an interpreted language that compiles into bytecode in order to make optimisations. To run a java program you would complete the following steps:
- Compile a source code file
Hello.java with javac Hello.java. This will create a bytecode file Hello.class.
- Start the JVM and run
Hello.class with java Hello.
Java can be thought of as a sequence of statements with each statement ending with a semi-colon.
Everything after a double slash // is a comment.
Multi-line comments start with:
Blocks
Statements surrounded by curly brackets form a block. Blocks can be nested.
Example
/*
Author: Ben
The HelloWorld class implements an application that prints out "Hello World".
*/
public class HelloWorld {

	// Main Method
	public static void main(String[] args) {
		System.out.println("Hello World");
	}
}
The large block is a class definition which is named HelloWorld.
The main block is an actionable member of that class.
The class name must be the same as the name of the source code file in which it is defined (but with the extension .java
Java Keywords
There are some words that are reserved for the compiler can cannot be used for tother purposes such as variable names.
Main Methods
HelloWorld has only one method called main.
- A class with a
main method like this is called the application class.
- The
main method is the entry point of the application, from which the JVM begins the execution of the program.
Capitalisation and Indentation
- Java is case sensitive so
main is different to Main.
- Indentation carries no meaning. The lines are ended by
;.
Code Conventions
- Identifiers use
CamelCase. Class names start in capitals; method and variable names in small letters.
- Indent your code when nesting.
- Add comments to explain what your code does.
Recommended Schedule
- Mon-Tue (1-2h)
- Watch videos, take a quiz, ask discussion questions.
- Tue-Wed (3h)
- Attend a lab and solve programming exercises.
- Wed (1h)
Enquiries should be directed to Patrick Totzke at: totzke@liverpool.ac.uk.
The professor will also be on Gather on Wednesdays 2-3pm.
Introduction to OOP
OOP is based on the idea of interacting object which contain both data and procedures and are an instances of a whole “class” of similar objects.
- Encapsulation
- Grouping data and code that acts on it into a single unit.
- Abstraction
- Hiding implementation details from users.
- Inheritance
- Using known classes of objects as blueprints from more specific ones.
- Polymorphics
- Different behaviours of subclasses by reconfiguring methods.
Class Introduction
Suppose that we make a class of person. They have data associated with them and methods they can perform.
You can have many instances of this object with different data.
Subclasses
Extending this, a student is a person with additional data (such as studentID)
You can make a subclass that extends the original class. This means that you inherit the information from the parent class.
Polymorphism
This is the concept that different objects in different subclasses, but in the same superclass, can be addressed in the same way but retrieve different results.
An example of this is a student who is foreign may respond to a greeting in a different language.
This is the proper way to write multi-line comments to summarise a code file. You can later compile these into doc files:
/**
* This program does such and such.
* @author Ben Weston <b.weston60@gmail.com>
*/
Strongly Typed Languages
In strongly typed languages you must explicitly say the type of a variable. You must also match your types appropriately when completing manipulations.
Strongly typed languages give the following benefits:
- Prevent accidental (or malicious) memory access.
- Capture preventable runtime errors at compile time.
- Compiler complains, not your users.
Type Casting
Is when you assign a value of one primate data type to a variable of another type.
- Widening Casting (automatic)
byte $\rightarrow$ short $\rightarrow$ char $\rightarrow$ int $\rightarrow$ long $\rightarrow$ float $\rightarrow$ double
 int myInt = 9;
 double myDouble = myInt; // Assigns 9.0
- Narrowing Casting (manually)
double $\rightarrow$ float $\rightarrow$ long $\rightarrow$ int $\rightarrow$ char $\rightarrow$ short $\rightarrow$ byte
 double myDouble = 9.78;
 int myInt = (int) myDouble;
 System.out.println(myDouble); // Outputs 9.78
 System.out.println(myInt); // Outputs 9
Constants
Constant are variable whose values don’t change in runtime:
final <type> <CONSTANT_NAME> = <value>;
Here final is a keyword to denote that the following is a constant.
By convention identifiers denoting constants are in all caps.
Why Use Constants
Compiler optimisations will result in smaller, binary code with a smaller memory footprint.
It also helps with readability so that you know what the values in your code mean.
Finally it makes your code easier to maintain as changes propagate through the program.
Variables
Testing equivalence of two floating point numbers should be done as follows to account for error:
double_1 == double_2 // Returns False
Math.abs(double_1 - double_2) < 0.000001; // Returns True
To use the maths library for mathematical constants use the following to import:
You would use the following in your code when you need $\pi$.
Control Flow
If statements can be made and chained as follows:
if (grade > 70) {
  System.out.PrintLn("Congrats on your first!");
}

else if (grade > 60) {
  System.out.PrintLn("Nicely done, you got a 2:1!");
}

else if (grade > 50) {
  System.out.PrintLn("Looks like you could have passed some more of the unit tests, but your code still passes most. ");
}

else if (grade > 40) {
  System.out.PrintLn("You've passed this lab, but try and make sure you follow the specification closely and make a good attempt at each problem. Semi-functional code is always better than no code at all.");
}

else {
  System.out.PrintLn("You haven't managed to pass this lab, but don't worry as there is still plenty of time to go back and improve. Watch the lecture videos, try to follow what's needed in the labs, and ask the TA's for help in a lab session if there's any concepts you don't get, that's what they're there for!");
}
Remember to use curly braces {} and to only end the content of the if with ;.
Java is strongly typed. This means that all types consist of a value and a type.
Types of Types
There are two different types of type in Java.
Primitive
int, byte, short and longfloat, and doublecharboolean
Composite
Literals
Literal values are the actual value of some type that occurs.
- 0 or 574489 are literals of type
int
true and false are literals of type boolean
A variable is a named memory location that can be changed during the program’s execution. It has three properties:
- A type.
- A value.
- A name or identifier.
Identifiers
Not all identifiers are valid. They can be an sequence of alphanumeric characters, $ and _ unless:
- They start with a number.
- It is a keyword.
Identifiers are case sensitive.
Conventions
- Class names start in capital letters.
- Method and variable names start in lower case letters.
- CamelCase is used if several words make up and identifier.
Example
In the following code all of the following keywords are identifiers:
HelloWorld, main, String, args, System, out and println.
public class HelloWorld {

	// Main Method
	public static void main(String[] args) {
		System.out.println(*"Hello World");
	}
}
Variable Declarations
A declaration statement declares a variable to be of a particular type and is of the form:
where <type> is a type and <variableName> a legal identifier.
double currentWeight;
int studentsLearningJava;
int maximumValue;
Variables must be declared before you can use them.
Variable Assignments
An assignment statement stores a value in a variable as follows:
<variableName> = <value>;
<variableName> may be any already declared identifier.<value> is a value of the same type as <variableName>.
Declaration and Initialisation
We can also combine declaration a variable with the assignment of an initial value (initialisation) as follows:
<type> <variableName> = <value>;
double currentWeight = 122.5;
int studentsLearningJava = 78;
Arrays are variable storing fixed-length lists of values with the same type.
For example we can have an integer array called count and type int[].
Array Types
For every type x there is a corresponding array type x[].
Declaring Array Variables
int[] numbers;
double[] reals;
boolean[] truthValues;
Creating Arrays
In order to use an array variable, the compiler needs to know the length of the array to allocate the appropriate chunk of memory.
There is a special statement that creates a new array:
double[] rates = new double[200];
boolean[] truthValues = new boolean[18];

// Length defined by another variable
int alphabetSize = 26;
int[] count = new int[alphabetSize];
Multi-dimensional Arrays
Every type x has an associated type x[]. This includes arrays. For example we can represent a chess board as 2D integer arrays.
int[][] board = new int [8][8];
You can also define arrays literally:
int[][] board = {
	{0,0,0,0,0,0,0,0},
	{0,0,0,0,0,0,0,0},
	...
	{0,0,0,0,0,0,0,0}
}
Imagine a program that does the following:
graph TD
i[Get Input]
i --> p[Positive?]
p -->|yes| Process
p -->|no| Complain
Process --> b[ ]
Complain --> b
if-else Statements in Java
if (condition) {
	// do stuff
}
else {
	// do something else
}
This means that if the condition holds the if bracket is executed and if not the else bracket is.
Relational Operators
The condition takes a boolean variable. Here are functions that take two inputs and return true or false:
| Operator |
Meaning |
> |
greater than |
< |
less than |
== |
equal to |
>= |
greater than or equal to |
<= |
less than or equal to |
!= |
not equal to |
Boolean Operators
| Operator |
Meaning |
! |
NOT |
&& |
AND |
|| |
OR |
^ |
XOR |
Initial Example
The initial example would be coded as follows:
int x = 5; // get input somehow

if (x > 0) {
	System.out.println("you gave me: " + x)
}
else {
	System.out.println(x + " is not positive!")
}
Methods are named code blocks. They:
- are defined inside a class definition.
- can have arguments and return value.
- correspond to functions or procedures in other languages.
Defining Methods
modifiers returnType methodName (parameters){
	// method body code here
}
Example
public class MaximumDemo {

	public static int maximum(int a, int b) {
		if(a>= b)
			return a;
		else
			return b;
	}
}
public and static are modifiers.int is the return value.maximum is the identifier.a and b are two arguments of type int.
Signatures
The modifiers, spelling of the identifier, types and ordering of the parameters together form the signature of the method.
A method is uniquely identified by it’s signature.
The following all have different signatures:
public static int max (int a, int b) {}
public static int maX (int a, int b) {}
public static int max (int a, double b) {}
public static int max (double b, int a) {}
public int max (int a, int b) {}
This is the same as the first above:
public static int max(int b, int a) {}
This is because the identifier of the parameter doesn’t change the signature.
main
The main method is a method like any other, except that the interpreter will look it up and call it when it starts.
We can access it’s command-line parameters via args:
public class Hello {
	public static void main(String[] args){
		System.out.print("Hello " + args[0] + "!");
	}
}
This will produce the following when run:
 $ java Hello Ben Weston
Hello Ben!
As the second argument is not used, it is not printed.
for Loops
These are used to repeat a block of code a fixed number of times:
for (initialisation;
	condition;
	update) {
		// stuff to repeat
}
Example
Print the first 10 integers:
for (int i = 1; i <= 10; i++) {
	System.out.println(i);
}
In this case the {} aren’t required as a single line statement is a block.
while Loops
while(condition) {
	// stuff to repeat
}
The condition is tested before running the loop. do while loops check after.
Example
This program adds integers until the user types 0:
//import java.util.Scanner;
Scanner input = new Scanner();

int total = 0;
int value = input.nextInt();

while (value != 0) {
	total += value;
	value = input.nextInt();
}
System.out.println(total);
When you are writing a large Java program you can run into the problem of a cluttered name-space. This means that you are running out of fresh names for your classes.
Packages
A Java package is a collection of related classes.
- The full name of a Java class if of the form
package.class.
- Packages can be nested.
- Packages from the “standard lib” start with
java or javax.
Example
The System class is in package java.lang. So it’s full name is java.lang.System.
Import
The import statement introduces a class to the current name-space.
The use java.util.Scanner to get user input we can tell the compiler to include that class at the top of a source file:
import java.util.Scanner.
This is a convenience. Instead, without importing it, we cal still refer to java.util.Scanner by its full name.
Apropos Convenience
The java.lang package is automatically available to all classes without using the import statement. This is why we could refer directly to System and write:
System.out.println("Hello World");
instead of having to use its full package name:
java.lang.System.out.println("Hello World");
Creating Packages
To assign a class to a package, we need to do two things:
-
Add a package statement to the source code:
Classes without this live in an unnamed default package.
-
Move the source file into a directory mypackage/ Both compiler and interpreter will look for class files in a directory names just like their package.
Packages are not required for the assignments.
Classpath
This is a list of directories from which packages are looked up.
javac and java both have command-line arguments to set the classpath.- The current directory is automatically added.
- You can use the environment-variables to set the classpath. (
CLASSPATH on Linux).
Conventions
- Package names are usually all lower case to avoid conflict with class names.
- It is common to use reversed domain names for packages.
- Yields globally unique package names.
- Avoids naming collisions between libraries from different sources.
Division by Zero in Java
Generally, will give no error and the result Infinity.
If you divide 0.0 by 0.0 then you will get the result NaN.
Code Blocks
Indentation is ignored by the compiler. You should use {} to properly define your blocks.
switch statements
This can we used as a case select statement.
switch (x) {
	case 0:
	case 1: // code to run
		break; // this will have it stop after the block.
	default: //default code to run
		break;
}
The break reserved word ceases execution of the switch block. The default case is not required.
Inherits from C/C++
int a = 0;
int b = 0;

int c = 12 > 10 ? ++a : b++;	// the ? can be used in place of an if
If the condition before ? is true then the first condition is executed. If false then the condition after : is executed.
To increment numbers ++ can be used. There can be two cases:
a++
- This evaluates to the old value of
a but increments a.
++a
- This evaluates to the increment of
a and increments a.
A Random Walk Example
Generating a Random Value of 1/-1
Math.random() gives a decimal number in the range $0\leq x<1$.
You can use Math.floor(x) to concatenate to integer.
Math.floor(Math.random()) will give 0 or 1 randomly.
Assessment 1
This assessment is based around the Caesar Cipher.
Javadoc automatically creates docs from javadoc comments in your code.
Javadoc comments are multi-line comments that start with /**, instead of /*. You can write HTML, text and tags in them.
Generating Javadocs
Generating javadocs is done with the javadoc command:
$ javadoc -d ./docs source.java
This will make a static page with source ./docs.
The following tags are available as sourced from: wikipedia.org/wiki/Javadoc.
The tags used in this lecture are highlighted in bold.
| Tag & Parameter |
Usage |
Applies to |
Since |
| @author John Smith |
Describes an author. |
Class, Interface, Enum |
|
| {@docRoot} |
Represents the relative path to the generated document’s root directory from any generated page. |
Class, Interface, Enum, Field, Method |
|
| @version version |
Provides software version entry. Max one per Class or Interface. |
Class, Interface, Enum |
|
| @since since-text |
Describes when this functionality has first existed. |
Class, Interface, Enum, Field, Method |
|
| @see reference |
Provides a link to other element of documentation. |
Class, Interface, Enum, Field, Method |
|
| @param name description |
Describes a method parameter. |
Method |
|
| @return description |
Describes the return value. |
Method |
|
| @exception classname description / @throws classname description |
Describes an exception that may be thrown from this method. |
Method |
|
| @deprecated description |
Describes an outdated method. |
Class, Interface, Enum, Field, Method |
|
| {@inheritDoc} |
Copies the description from the overridden method. |
Overriding Method |
1.4.0 |
| {@link reference} |
Link to other symbol. |
Class, Interface, Enum, Field, Method |
|
| {@linkplain reference} |
Identical to {@link}, except the link’s label is displayed in plain text than code font. |
Class, Interface, Enum, Field, Method |
|
| {@value #STATIC_FIELD} |
Return the value of a static field. |
Static Field |
1.4.0 |
| {@code literal} |
Formats literal text in the code font. It is equivalent to {@literal}. |
Class, Interface, Enum, Field, Method |
1.5.0 |
| {@literal literal} |
Denotes literal text. The enclosed text is interpreted as not containing HTML markup or nested javadoc tags. |
Class, Interface, Enum, Field, Method |
1.5.0 |
| {@serial literal} |
Used in the doc comment for a default serializable field. |
Field |
|
| {@serialData literal} |
Documents the data written by the writeObject( ) or writeExternal( ) methods. |
Field, Method |
|
| {@serialField literal} |
Documents an ObjectStreamField component. |
Field |
|
An object represents a specific, identifiable part of the world-model:
- It incorporates (passive) attributes.
- It has (active) behaviours, services.
- Objects interact by sending messages.
Here is an example of three objects:
Here is an interaction between Russ, the ATM near the guild and his account:
graph LR
Russ -->|"requestBalance()"| ATM
ATM -->|152.50| Russ
ATM -->|"getBalance()"| BA[Bank Account]
BA -->|152.50| ATM
Russ has no idea about what happens inside the ATM and only able to directly interact with his account.
There are two methods of creating objects:
- Copying and adjusting existing ones.
- Instantiating a template.
Classes
A class is a template of blueprint for objects:
- It specifies which attributes and methods should exist.
- An object can be an instance of the class.
For example you may have many instances of rectangles that follow the following class:
classDiagram
class Rectangle{
	-int size
	-int colour
	+area() int
}
This is an UML class diagram.
Class Diagrams
The boxes are laid out in the following order:
- Name
- Attributes
- Methods
Java Objects & Classes
To create objects in Java you need to:
- Define a class.
- Instantiate a new object of that class.
Defining a Class
public class Rectangle{
	// Attributes
	private int side;
	private int colour;
	// Methods
	public int area() {
		return side * side;
	}
}
Instantiating an Object
Every class defines a type and so variables can be declared like this:
This defines a variable of the type Rectangle called r.
Object can be instantiated using the keyword new like this:
We recall that classes are templates for creating objects and we can instantiate an object by using the keyword new.
Behind the scenes the following happen:
- The JVM allocates memory to store the new object.
- A constructor method is called to initialise it.
Constructor Methods
A constructor method is a special method that gets called when the object is created. It is intended to set up the object for later use.
The syntax for constructor methods is almost the same as for normal methods, except that:
- It must be named just like the class.
- It has no declared return type.
Example
public class Rectangle {
	private int side;
	private String colour;

	public Rectangle(int s, String c) { // constructor method
		side = s;
		colour = c;
	}
}
Can be instantiated by:
Rectangle r = new Rectangle(5, "red");
Multiple Constructors
A class can have more than one constructor (which requires the to have different signatures).
This can be useful to make an object that can change one attribute without dealing with the rest.
If you don;t define any constructors, the class will automatically get a trivial default constructor without arguments.
One Constructor can Call Another
public class Rectangle {
	private int side;
	private String colour;

	public Rectangle(int s, String c) { // line 5
		side = s;
		colour = c;
	}
	public Rectangle(int s) {
		this(s, "blue"); // call line 5
	}
}
This can set a default of blue an just set the side length.
Public and Private Content
Attributes and methods can be public or private:
It is good practice to declare attributes private to avoid accidental outside interference or messy dependencies.
This principle is called information hiding or encapsulation.
Setting Private Attributes via Methods
You can introduce public methods whose sole job it is to get or set the value of private attributes.
- Methods that modify attributes are called mutators.
- Methods that retrieve the value of an attribute are called accessors.
It is convention to call them getX or setX for private attributes X.
Alarm Clock Example
classDiagram
class AlarmClock{
	-time int
	-alarm int
	+getTime()
    +setAlarm(int)
}
- means private and + means public.
AlarmClock a  new AlarmClock();
int t = a.getTime();
a.setAlarm(t + 5);
Instance Variables
Ordinarily, attribute values belong to individual objects and methods describe the object’s individual response to messages.
An example is that two alarm clocks can each have their own type.
Class Variables
Using the keyword static you can declare that an attribute (or method) belongs to the class. This means that it is shared among all instances.
An example would be that all alarm clock from your manufacturer have the same make.
Static Variables & Methods
-
The values of static variables can be read and modified by all instances of the class, as well as from within static methods.
Changing the make of one clock will affect all other clocks.
-
static methods cannot access instance variables or instance methods but only other static members.
One clock cannot directly find out the time of another clock without a service.
-
static methods can be called directly on the class without instantiating an object. E.g. AlarmClock.ring();.
static and public methods can be called without making an object.
Inheritance
This is a mechanism of creating a new subclass based on an existing superclass, retaining a similar implementation.
This allows the following two:
- Abstraction - It allows to express an “is-a” relationship. Every instance of the subclass is also and instance of the superclass.
- Code re-use - A subclass inherits methods/attributes and only needs to implement what’s new.
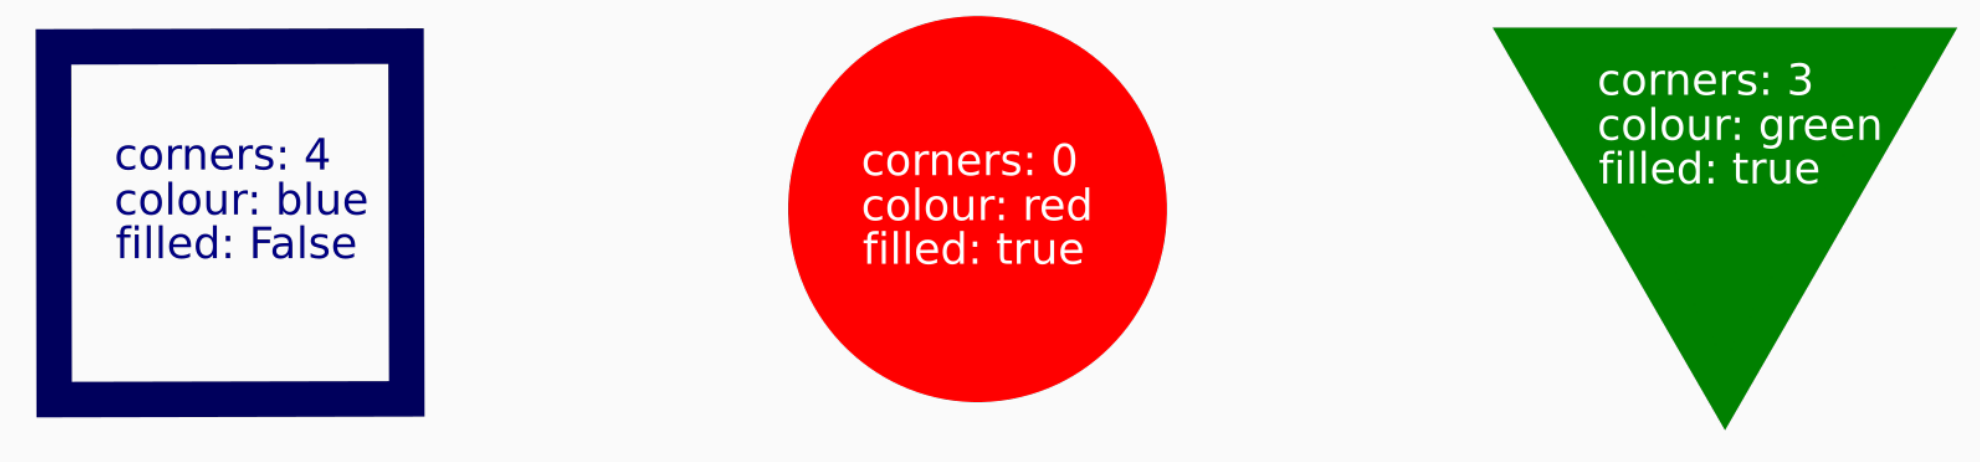
Shapes Example
Our existing example was left with the following classes:
classDiagram
    class Circle{
    +colour String
    +radius double
    +area() double
    }
    class Square{
    +colour String
    +corners int
    +side double
    +area() double
    }
    class Triangle{
    +colour String
    +corners int
    +side double
    +area() double
    }
We can make this into a super-class of Shape buy reassigning redundant variables:
classDiagram
    Shape <|-- Circle
    Shape <|-- Square
    Shape <|-- Triangle
    Shape: +colour String
    class Circle{
    +radius double
    +area() double
    }
    class Square{
    +corners int
    +side double
    +area() double
    }
    class Triangle{
    +corners int
    +side double
    +area() double
    }
You could also make an additional intermediate class:
classDiagram
    Shape <|-- Circle
    Shape <|-- Polygon
    Shape: +colour String
    Polygon: +corners int
    Polygon: +side double
    Polygon: +area() double
    Polygon <|-- Square
    Polygon <|-- Triangle
    class Circle{
    +radius double
    +area() double
    }
This tree is called a class hierarchy
Always exclude all attributes and methods from the superclass in subclasses.
classDiagram
classA --|> classB : Inheritance
classC --* classD : Composition
classE --o classF : Aggregation
classG --> classH : Association
classI -- classJ : Link(Solid)
classK ..> classL : Dependency
classM ..|> classN : Realization
classO .. classP : Link(Dashed)
Java Syntax for Subclass Definitions
The Java keyword extends is used to specify the subclass/superclass relationship in class definitions.
public class Triangle extends Polygon {
	// public int colour;	// inherited from Shape
	// public int corners;	// inherited from Polygon
	public double side;	// only in Triangle
	public double area; () {...}
}
Single vs. Multiple Inheritance
classDiagram
    Shape <|-- Triangle
    MusicalInstrument <|-- Triangle
    Shape: +colour String
    MusicalInstrument: +pitch int
    class Triangle{
    +corners int
    +side double
    +area() double
    }
In Java this is not possible, every class has exactly one superclass, with the exception of Object.
The exception is because Object is the root class, meaning every class is a sub-class of Object.
What is Inherited?
A subclass inherits all public or protected members of its superclass. This includes:
This does not include constructor methods as they are not members of the super-class.
protected
This is similar to private fields or methods but they cannot be accessed from outside an instance directly.
A protected field or method is inherited whereas a private identifier is only accessible in the class where it is defined.
In UML diagrams, # depicts protected class members.
Uses of Inheritance
- Inheritance can introduce more abstraction in the code.
- It enhances core re-use.
- It improves the code readability.
- Properly applied, inheritance can reduce software maintenance costs.
Overriding a Superclass Method
A subclass inherits the public or protected attributes and methods in its superclass.
It can override an inherited method (identified by its signature) by re-implementing an inherited method.
Shapes Example
classDiagram
	Shape <|-- Circle
	class Shape{
		+colour String
		+toString() String
	}
	class Circle{
		+radius double
		+area() double
	}
Consider that the Shape.toString() function returns a statement like: “I am a colour shape.”
You may want to re-implement this for the subclass to be more specific.
Example in Java
The following code would emulate the behaviour above:
public class Shape {
	public String colour;
	public String toString() {
		return "I'm a " + colour + " shape!";
	}
}
public class Circle extends Shape {
	public double radius;
	public String toString() {
		return "I'm a " + colour + " circle!";
	}
	// Show print functions
	public static void main(String[] args) {
		Shape s = new Shape();
		s.colour = "red";
		System.out.println(s.toString());
		Circle c = new Circle();
		c.colour = "red";
		System.out.println(c.toString());
	}
}
Object Class
As all classes are subclasses of the Object class we can draw the following hierarchy:
classDiagram
	Shape <|-- Circle
	Object <|-- Shape
	Object: +toString() String
	class Shape{
		+colour String
		+toString() String
	}
	class Circle{
		+radius double
		+area() double
		+toString() String
	}
The Object class has a toString() method of its own so we have also overwritten it using Shape. This is the reason why you can always print a given object by calling:
Overriding vs. Overloading
- Overriding - Involves providing several methods with the same name and parameter list, but declared in classes which are in a subclass/superclass relationship.
- Overloading - Involves providing several methods with the same name, but different parameter lists.
Class Hierarchy = Type Hierarchy
Every class defines a data type.
- Subclasses therefore define sub-types.
Example
Every circle is also a shape and thus can be assigned to a variable of type Shape.
classDiagram
	Shape <|-- Circle
	class Shape{
		+colour String
		+toString() String
	}
	class Circle{
		+radius double
		+area() double
		+toString() String
	}
Shape s = new Circle();
s.colour = "red";
s.radius = 2.0; // this will fail
s.to.String(); // this will call Circle.toString()
Assigning Variables Between Subclasses
Circle c = new Circle("red");
Triangle t = new Triangle ("blue");

Shape s = c; // makes a new shape initialised to c
System.out.println(s); // calls s.toString() from circle

s = t; // reassigns to triangle
System.out.println(s); // calls s.toString() from triangle
You can see that the Shape s inherits the methods from it’s assignment when assigned a variable of a subclass.
Type Casting
This is telling the compiler that an object is from a particular subclass and not of a superclass.
Shape s = new Circle();
Circle c = s; // will fail as not every Shape is Circle
Circle c = (Circle)s; // will pass as we know s is Circle
We can stop instantiations of certain superclasses by making them abstract:
classDiagram
class Shape
<<abstract>> Shape
Shape : +colour String
Shape <|-- Circle
class Circle{
	+radius double
	+area() double
}
The name of this class should be in italics. If it is abstract.
I have used an annotation here which is also acceptable.
Code Example
public abstract class Shape {
	public String colour;
}
public class Circle extends Shape {
	public double radius;
	public double area() {
		return (radius * radius) * Math.PI;
	}
}
Shape s = new Circle();
Shape s = new Shape(); // not possible as Shape is abstract
Abstract Classes
- Cannot be instantiated.
- Can be extended and concrete (non-abstract) subclasses can be.
Abstract Methods
- Do not provide a full implementation.
- They have to be overrode by subclasses.
Example
public abstract class Shape {
	public String colour;
	public abstract double area();
	public String report() {
		return "My area is " + area();
	}
}
By stating abstract on the area we say that this method must be overrode by subclasses.
You can also call abstract methods before they are defined.
public class Circle extends Shape {
	public double radius;
	public double area() {
		return (radius * radius) * Math.PI;
	}
}
Shape s = new Circle();
double a = s.area();
double a = ((Circle) s).area();
String r = s.report();
If we implement an abstract method for Shape.area then the second line will work. If not we will have to type-cast like in the third line.
Summary
There are two good reasons for making a class `abstract:
- To prevent it from being instantiated.
- To enforce that concrete (instantiable) subclasses override.
Interfaces allow you to abstract the workings of your code and provide simple interfaces to the user:
Lamp Example
public interface Switchable {
	public void switchOn();
	public void switchOff();
}
This defines the interface type that someone can call.
Switchable l = new Lamp();
l.switchOn();
l.switchOff();
This is the use for the interface.
public class Lamp implements Switchable {
	public void switchOn() {
		// method
	}
	public void switchOff() {
		// method
	}
}
This is the implementation of the interface.
Interfaces
In java, an interface is a specification which public methods must exist in a class that implements it.
This is like a contract that the front and back-end programmers must adhere to.
- Interfaces define a type.
- Typically only contains constants and methods signatures.
- Cannot be instantiated.
- Can be implemented by a class, which then has to contain all method bodies declared in the interface.
- Can be extended by other interfaces.
- A class can implement more than one interface.
Extending Interfaces
A class can implement several interfaces. Such a class would have to implement all methods from all the interfaces it implements.
public class Lamp implements Switchable, Pluggable {
	// Switchable methods
	// Plugable methods
}
An interface can itself extend one or more other interfaces:
interface Dimmable extends Switchable, Plugable {
	...
}
This means that if you want to provide Dimmable then you have to provide implementations for all the methods in the other interfaces.
An interface cannot implement other interfaces:
public interface Dimmable implements Switchable {
	...
}
This does not work.
Implementing Multiple Interfaces in a class
A class can also extend from other classes while implementing interfaces:
public class Lamp extends Furnature implements Switchable, Pluggable {
	// Switchable methods
	// Plugable methods
}
Conventions
- Interface identifiers end in “-able”:
java.Lang.Comparablejava.io.Serializable
- All interface methods are
public and abstract.
- All attributes are
public, static and final.
Interfaces vs. Abstract Classes
| Abstract Classes |
Interfaces |
Can only extend one superclass. |
Multiple inheritance between interfaces. |
Can extend any class. |
Can only extend interfaces. |
May have abstract and concrete methods. |
Only abstract methods. |
protected methods allowed. |
Methods are public abstract. |
| No restriction on attribute modifiers. |
Only public static final variables. |
- The purpose of abstract classes is to provide abstraction when designing type hierarchies or class hierarchies.
- Interfaces are for specifying the
public facing services or to coordinate several groups of programmers/software.
UML diagrams including abstract classes and interfaces can be drawn in the following way:
classDiagram
Degreeable <|.. Dog
Emailable <|.. ResearchCouncil
Billable <|.. ResearchCouncil
Degreeable <|.. Student
Billable <|.. Student
Emailable <|.. Person
Person <|-- Lecturer
Payable <|.. Lecturer
Person <|-- Student
Lecturer <|-- Professor
class Person{
    <<Abstract>>
    -name String
    -email String
    +greet() String
    +setName(String)
    +getName() String
    +setEmail(String)
    +getEmail() String
}
class Student{
    -grade int
    +setGrade(int)
    +getGrade() int
}
class Lecturer{
    -timetable String
    +setTimeTable(String)
    +getTimeTable() String
}
class Professor{
    -budget int
    +setBudget(int)
    +getBudget() int
}
class Degreeable{
    <<Interface>>
    +awardDegree()
}
class Billable{
    <<Interface>>
    +payBill(int)
}
class Emailable{
    <<Interface>>
    +sendEmail()
}
class Payable{
    +payAmount(int)
}
class Dog{
    -goodGirl Boolean
}
class ResearchCouncil{
    -name String
    -email String
    +greet() String
    +setName(String)
    +getName() String
    +setEmail(String)
    +getEmail() String
}
Collections are containers to store objects:
- They are parameterised by a base type.
- They can be dynamically resized.
- They can store and access content in different ways.
Example - List of Strings
import java.util.*;
List<String> customers;
customers = new ArrayList<String>();

customers.add("Ms. X");
customers.add("Mr. Y");
customers.add("Mx. Z");

int count = customers.size();
String next = customers.get(2);
This shows that we can get an element from a list of strings using x.get() and the size of a list with x.size().
From this code we can make the following UML diagram:
classDiagram
Collection <|-- List
List <|.. ArrayList
class Collection{
    <<Interface>>
}
class List{
    <<Interface>>
}
This is to say that a List is a type of Collection and ArrayList is an implementation of a List.
This is an example of generics/parameterised types as you can change String to another object.
Generics
You should be careful when using generics as they only accept objects and not primitives/base-types.
You must use a wrapper class such as Integer instead of int to overcome this.
Inside java.util
classDiagram
Collection <|-- List
Collection <|-- Set
Collection <|-- Queue
List <|.. ArrayList
List <|.. Linked List
List <|.. Vector
Set <|.. HashSet
Set <|.. LinkedHashSet
Set <|.. TreeSet
Queue <|.. Dequeue
Queue <|.. LinkedQueue
Queue <|.. PriorityQueue
Collection: <<Interface>>
List: <<Interface>>
Set: <<Interface>>
Queue: <<Interface>>
Stacks
Stack<Integer> st = new Stack<Integer>();

// push to the stack
st.push(12);
st.push(-1);
st.push(10);
System.out.println(st);

// pop the topmost stack element
int x = st.pop();
You can also call the size method from Collection to find the size of a stack.
Maps
- Store (
key, value) pairs.
- Have two parameters (
key type, value type).
A useful implementation is java.util.HashMap.
HashMap<K,V> requires that K.hashCode() exists.
HashMap Example
// create a mapping from strings to integers.
Map<String, Integer> wc = new HashMap<String, Integer>();

// store a (key, value) pair
wc.put("place", 3);

// access the value associated with a key
int number = wc.get("place");

// check if key has a value
bool contains = wc.containsKey("and");

// remove some pair completely
wc.remove("the");
Map is the interface and HashMap is the class that implements that interface.
Why Use Collections
To utilise established and well-tested implementations from common algorithmic data structures and tasks.
- Avoid linked lists.
- Maximised code-reuse.
- Ensure inter-operability.
It is always best to use the standard library if an implementation exists.
Using for loops on lists can be dangerous as their size is not static.
We can separate the traversal logic from the underlying collection by using iterators.
Iterator Design Pattern
Iterators provide a way to access elements of an aggregate object sequentially without exposing its underling representation.
- Iterators are objects.
- Single-use
- Represents one complete iteration across the collection.
- Can provide safe access to a collection.
- Are often created by the collection itself.
Example
We can filer a List<Bill> using an Iterator as follows:
// get an iterator from the collection
Iterator<Bill> iter = bills.iterator();

while (iter.hasNext()){
	Bill b = iter.next();	// access next entry
	if (b.is_paid()){
		iter.remove();	// remove it from the list
	}
}
Java Iterators
Iterator<T> is a parameterised interface. You must specify the type of object stored in the collection.Iterators provide a safe remove() method that removes the last element returned by its next() method.- This is different from the
remove() method of the collection.
Alternative for Syntax
If you don’t need to write to the collection, so don’t need the iterator, then you can use the following syntax:
for (Bill b : bills){
	// System.out.println(b);
}
which is equivalent to:
Iterator<Bill> iter=bills.iterator();
while (iter.hasNext()){
	Bill b = iter.next();
	// System.out.println(b);
}
Normal Program Flow
In normal program flow, one subroutine will call another while the original is put on hold:
graph LR
main -->|1| x
x -->|2| y
y -->|3| x
x -->|4| main
This is called the call stack.
Errors
There are several ways to handle errors if they occur in the call stack.
- Account for all possible errors in the function that you call.
- Pretend that the error didn’t happen and continue with the calling function.
- Have the called function return an error code.
- Have the called function raise an exception.
- This reports that an anomaly has occurred.
- If this is the case the interpreter will execute the exception handler from the calling function.
- If there is no exception handler in the calling function we look further up the call stack until one or none is found.
Exception Handling
- This method of error handling standardised error handing.
- Clean separation of error handling and normal code.
There are two aspects to exception handling:
- To report an anomaly you raise or throw and exception.
- To deal with possible exceptions, define suitable handler.
Common Pattern
try {
	do stuff;	// errors may happen
}
catch exception {
	deal with it;	// handler
}
The exception could have the following effects:
- Report and re-throw.
- Log and continue.
Exception handling in OOP
Exceptions are objects.
When an anomaly occurs an Exception object is created:
- It represents the situation and has relevant info.
- The environment looks for a handler based on its type.
Exception Classes
classDiagram
Exception <|-- FileNotFoundException
Exception <|-- DivByZeroException
Exception <|-- ArrayOutOfBoundsException
Exception: +get_trace() String
FileNotFoundException: +path String
You could also have a deeper hierarchy for particular types of exception:
classDiagram
Exception <|-- IOException
Exception <|-- DivByZeroException
Exception <|-- ArrayOutOfBoundsException
IOException <|-- FileNotFoundException
IOException <|-- FileAccessException
Exception: +get_trace() String
FileNotFoundException: +path String
Extended Pattern
This is a pattern that used multiple exception handlers from different classes:
try {
	// open a file for writing
}
catch (FileNotFoundException e) {
	// complain that e.path was invalid
}
catch (FileAccessException e) {
	// complain that file is read-only
}
When something unexpected happens:
- An
Exception object is created.
- The interpreted looks for, and calls a matching handler.
Java Syntax
try {
	// dangerous code
	// may throw XException, YException, ...
}
catch (XException e) {
	// handle XExceptions
}
catch(YException e) {
	// handle YExceptions
}
...
finally {
	// will eventually get executed in any case
}
The first exception whose parameter type matches the exception is picked.
To throw an exception manually you would:
try {
	throw(e)	// if e already exists
	throw(new XExeption())	// throw a new exception
}
catch (XException e) {
	// handle XExceptions
}
catch(YException e) {
	// handle YExceptions
}
Catch or Declare
Java wants you to specify as part of a methods signature, which exceptions it may throw. This allows analysis at compile time.
Declared Exceptions
The syntax to declare is:
public String myMethod() throws XException {
	// method body may throw XExceptions
	// or call code that does
}
Caught Exceptions
public class ReadFromKeyboard {
	public static void main (String args[]) {
		// read one byte from stdin
		int myChar = System.in.read();
		// interpret that int as a char and print
		System.out.println((char) myChar);
	}
}
The call to System.in.read() can create exceptions.
Two fix this we could use one of the following methods:
import java.io.IOExceptions;

public class ReadFromKeyboard {
	public static void main (String args[]) throws IOException {
		// read one byte from stdin
		int myChar = System.in.read();
		// interpret that int as a char and print
		System.out.println((char) myChar);
	}
}
This is declaring the exception.
import java.io.IOExceptions;

public class ReadFromKeyboard {
	public static void main (String args[]) {
		try{
			// read one byte from stdin
			int myChar = System.in.read();
			// interpret that int as a char and print
			System.out.println((char) myChar);
		}
		catch(IOException e) {
			e.printStackTrace();
		}
	}
}
This is catching the exception.
This can be bad practice as developers can make useless catchall exception handlers.
Throwables
Throwables allow certain types of exception to not be declared.
java.lang defines the following classes that can be thrown:
Error classes is for non-recoverable situations.Exception classes are for recoverable situations.
Unchecked Throwables
The compiler won’t complain for throwables part of the following super-classes:
java.util Exceptions
There are several exceptions already part of the java.util package:
ArithmeticException
- Arithmetical operations such as dividing by zero.
ArrayIndexOutOfBoundsException
- Trying to access an index that is negative or bigger than the size of an array.
FileNotFoundException
- Trying to access a file that doesn’t exist or is otherwise not accessible.
NullPointerException
- Reggering to memebers of a
null object.
InputMismatchException
- Unexpected format e.g for
String args.
This is quite useful.
StringsIndexOutOfBoundsException
- Using an index that is negative or beyond the length of the
String object.
Have a look for standard exceptions before making your own.
File Handles
This is an object that represents a file on the disk (a path in the file system).
java.io.File is used to represent files and provides methods to interact with the file system.
You can call the following methods on a File:
- Deleting
- Renaming
- Check if it exists:
- Check if it is a file
- Check if it is a folder
classDiagram
class File{
	+delete() boolean
    +renameTo(File dest) boolean
    +isDirectory() boolean
    +isFile() boolean
    +getPath() String
}
Renaming
import java.io.File;
...

File f1 = new File("output.txt");
File f2 = new File("stuff.out");
if(f1.rename.To(f2)) {
	System.out.println("File rename successful");
else {
	System.out.println("File rename failed");
}
This is not handled using exceptions.
Dealing with Path Differences
Windows uses \ and Unix uses / for directory separators.
To remove this use you can use the separator attribute of the File class:
import java.io.File;

String sep = File.separator;
File fh = new File("data"+ sep + "output.txt");
This will input the appropriate separator for the file-system.
Reading a File with FileReader
The following code will read in a file one character at a time and print it out:
File fileHandler = new File("this-file.txt");
FileReader fileReader = new FileReader(fileHandler);

int i;
while((i = fileReader.read()) != -1) {
	char c = (char)i;
	System.out.print(c);
}
.read() gets the contents one character at a time.
Opening a file that doesn’t exist will give an IOException. This must be done in a try catch block.
Streams are an endless flow of data from a source to a destination:
graph LR
Source -->|write| 010010
010010 -->|read| Destination
Streams are objects. There are different classes for various types of sources and destinations.
Streams as Object
The standard library java.io implements streams in an object-oriented way.
The InputStream class is read from:
graph LR
subgraph InputStream
Source -->|write| 010010
end
010010 -->|read| Destination
The OutputStream class is written to:
graph LR
Source -->|write| 010010
subgraph OutputStream
010010 -->|read| Destination
end
Stream Contents
There are several basic types of data that can be transported by a stream:
- Basic
Input/OutputStreams are byte-based:
- You can read/write a byte = 8 bits.
- For example,
public int InputStream.read() reads the next bytes of datat from the input stream.
java.io.Reader/Writer are based on characters:
ObjectInputStream and ObjectOutputStream represent streams that can send whole objects.
- Works as long as the object belongs to a class that implements the
Serialisable interface.
public Object ObjectInputStream.readObject() reads the next object.
Standard Streams
The standard streams include:
These are represented in the following classes:
classDiagram
InputStream <|-- in
OutputStream <|.. PrintStream
PrintStream <|-- out
PrintStream <|-- err
class InputStream {
    +read() in
    +read(byte[] b) int
}
class OutputStream {
    +write(int b) void
    +write(byte[] b) void
}
class PrintStream {
    +print(boolean s) void
    +print(char c) void
    +print(char[] s) void
    +print(String s) void
    +println(String s) void
}
in, out and err in this diagram are representing the objects:
System.inSystem.outSystem.err
Java I/O Summary
- All of Java’s input/output is based on Streams
InputStream, OutputStream:
Reader, Writer:
- There are many derived types in
java.io:
- File Access
- Network Access
Due to the large number of I/O classes in java.io.Files, there is a class called:
This class consists of several static function calls that cater to common use cases.
You should look in this class before looking elsewhere.
Reading from File
A classic approach to reading from a text file uses a BufferedReader to read the file line by line, and looks something like this:
File file = new File(filePathAsString);
try(BufferedReader br = Files.newBufferedReader(file.toPath())) {
    String str = "";
    while ((str = br.readLine()) != null) {
        //do some logic with str
    }
} catch(IOException ioe) {
    throw ioe;
}
- The first line of this code creates a
java.io.File class from a file path String (e.g. “myDirectory/myFile.txt”).
-
The second line uses the Files.newBufferedReader method to instantiate a BufferedReader. It takes as its first argument the Path object associated to a file, and then allows for optional parameters that alter things like the character set. We omit these so it will have default settings and character set, UTF-8. This line is an example of try with resources, which is syntactic sugar for a lengthy try/catch construct.
By declaring br inside the try, we ensure that it will be closed, which prevents resource leaks. If we didn’t use try with resources, we’d need to call br.close() in a finally block.
- The third line just initializes an empty String.
-
The strange looking fourth line tries to read the next line of the file into str using BufferedReader’s readLine method. Once this operation is performed, the result of that assignment is null checked, and if str has become null we know we’ve reached the end of the file. So, this is just a loop that says read every line in as a String until the end of file.
readLine() discards the trailing newline (\n), so if you wanted to reproduce the file’s content exactly you would need to add this back to the string.
- The code enclosed by the while loop is where you would do your logic using the newly read
str. There is then a catch block that throws an IOException if the BufferedReader runs into one.
The code above is a perfectly functional way to handle file I/O, but java.nio.file.Files offers a couple of simpler alternatives to cover this use case.
Using java.nio.file.Files
Lines as an ArrayList
The first, and what is probably most useful, is Files.readAllLines(path), which returns a List of every line, in order. That looks like this:
File file = new File(filePathAsString);
ArrayList<String> yourList = (ArrayList<String>) Files.readAllLines(file.toPath());
In two lines of code we now have every line of the file, ordered, in an ArrayList we can traverse with a simple for loop. This code practically is just a tidier repackaging of the code above, where the inner loop adds str to a List<String> initialized as empty before the try.
Original File as String
Another two-liner if you just want the whole file as one big String with the white space and new lines of the file preserved, is given below:
File file = new File(filePathAsString);
String yourFilesContent = Files.readString(file.toPath());
Both the readAllLines and readString methods throw IOExceptions. This is a checked exception type so you need to throw or catch them (as in the initial example).
These methods are not performance optimised, so if you need to read a very large file in a performance intensive setting (e.g. developing an industry strength library) these aren’t the way to go. However, in most cases both are fine.
Consider the following text as a test for regular expressions:
It is a period of civil war. Rebel spaceships, striking from a hidden base, have won their first victory against the evil Galactic Empire. During the battle, Rebel spies managed to steal secret plans to the Empire’s ultimate weapon, the DEATH STAR, an armored space station with enough power to destroy an entire planet. Pursued by the Empire’s sinister agents, Princess Leia races home aboard her starship, custodian of the stolen plans that can save her people and restore freedom to the galaxy…
Regex in Java
The Java classes for regular expressions are Pattern and Matcher in java.util.regex.
The standard usage is to define a regular expression that we wish to match, and compile this Pattern. We then take the string that we wish to match and compare our regular expression against this with Matcher.
Matcher Objects
Let us say we wished to search for a specific string, such as the word “Rebel”.
To do this we must first define a matching pattern for the regular expression. As we are trying to match the word “Rebel”, in our input we wish to match the characters “R”, “e”, “b”, “e”, “l”, in sequence.
This is a common operation and so it is made easy in Regex, to match this the corresponding string is "Rebel":
Pattern pattern = Pattern.compile("Rebel");
Matcher matcher = pattern.matcher(input);
Querying a Matcher Object
Now that we have a matched Matcher object, we can query this to find the results of our matching. There are three core methods that we will use. start(), end(), and find().
matcher.start() returns the integer of the 0th position of the first occurrence of the matching regex within the input array. Unsurprisingly matcher.end() tells us the integer position that the regex stops matching. If we call matcher.find() this will return true if the input string has another occurrence of the regex, and will move onto this part of the string. If no more matches remain, it will return false.
This means the easiest way to work with this is in a while loop, as this method will exit the loop once it has reached the end of the String:
while(matcher.find()) {
    System.out.println(matcher.start());
    System.out.println(matcher.end());
    System.out.println(input.substring(matcher.start(), matcher.end()));
}
If we run this, we see that it prints the start and end integers of each match in the input string, and we can use the substring(start, end) method to display each of our matches.
$ java Rebel
29
34
Rebel
158
163
Rebel
Or
| is used as or in regex. To match two strings you could use the following:
Pattern pattern = Pattern.compile("Rebel|Empire");
Character Sets/Ranges
To define a character set use []. You can set the range of characters like so: [0-9].
This will match a single character in that set.
Set Boundaries
To define how many times to match a character set you can use a qualifier with {}.
For example, [A-Z]{5} would match with all sequences of file letters which are fully capitalised. We can also use ranges: [A-Z]{5-7}.
There are also some looser qualifiers:
+ - One or more.* - Zero or more.
If we made the regex [A-Z]* this would also match with each space in our string as this matches zero or more. We must also tell the regex to only start scanning for matching patterns once we have reached a boundary:
^ Start of line anchor.\\b Start or end of a word.
$ End of line anchor.
Wildcards
To save writing sets for commonly matched values, the following wildcards exist:
To match the opposite of these wildcards you can use the uppercase version. For example, \D will match non-numerical characters.
In Java you must escape backslashes, \, when you want to write them in a String literal. This makes \d into \\d and so on.
Grouping
To match a second regex from a previous group you can use (). For example From:(.*) will save all of the characters after From: to a specific group.
When using groups the regular expression will match the entire regular expression and save this as the first (0th) group. It will then work through each set of brackets and save these in subsequent groups. We access each of these groups via their integer index and the group() method.
Pattern pattern = Pattern.compile("From:(.*)");
Matcher matcher = pattern.matcher(spam);
System.out.println("After From: " + matcher.group(1));
Installation
Refer to the installation notes for full install details. In summary, install the gradle package:
Setting up a Java Gradle Project
This will be following the documentation for setting up a new java project.
-
Create a new project directory:
-
Make a new gradle project using the step-by-step wizard.
- For project type choose application (2).
- As implementation language chose Java (3).
- As test framework select “JUnit Jupiter” (4).
- For the other questions just select the default value.
- Several files and a folder hierarchy are created. This includes a simple “Hello World” program.
-
To test, build and run your code execute in the root of the project:
The program is run after the output:
Gradle Tasks
Gradle has has several tasks:
-
To clean the project directory:
This will remove all compiler class files.
-
To compile but not run your project:
This will compiler all java source files in app/src/main/java and output the compiler bytecode into app/build/main.
To view additional help run:
There are many I/O classes, view the full Oracle I/O tutorial here.
Scanner
java.util.Scanner splits up an input into tokens that can be read one at a time.
You can scan through these using the has.Next() and look for specific types using other methods:
double sum = 0;
try (Scanner scan = new Scanner("20.40 notadouble 30.45 gawef 49.15")) {
	while(scan.hasNext()) {
		if(scan.hasNextDouble()) {
			sum += scan.nextDouble();
		}
		else {
			scan.next();
		}
	}
}
System.out.println(sum);
By using a try with resource, Java will close the Scanner after is is finished being used.
Scanner vs Reader
Scanner has pretty all of the functionality of BufferedReader, including a nextLine() function that allows you to break up a file line by line and skip the remaining tokens on a given line. That said, it is slower and more expensive than BufferedReader, which is the preferred option if you just want text. Further, the nextLine() functionality can make the scanning process messy, as it can potentially skip a lot of tokens, and was not really designed for the use case we discussed last week. A common use case is thus to use a BufferedReader to read a file in as Strings, and then use a Scanner to break these Strings into tokens.
BufferedWriter
To write to a file you can use the following example code:
String test = "This is a test."
try(BufferedWriter bw = Files.newBufferedWriter(outPath)) {
	bw.write(test);
}
By using a try with resource, the file is written out when the try has executed.
To force the buffer to be written use bw.flush().
You should avoid closing the stream until you are sure that you are done writing to a file.
A full textbook on git as available called: ProGit.
Local Setup
The bare minimum of setup is to set the user.name and user.email:
$ git config --global user.name "Ben Weston"
$ git config --global user.email sgbweso@liverpool.ac.uk
Creating a Repository
To initialise a new repository you can do the following inside a new folder:
To check the status of the repo use:
Adding Files
To stage a new file that you have made, run the following:
To commit this file to the database you can use the following:
$ git commit -m "Adding the newest file ever."
To use a text editor to draft the commit message, ommit the -m flag.
You can see your history of coimmits by using:
Changing and Reverting Files
To add the changes for all modified (but not new) files:
$ git commit -a -m "Adding changes."
To remove to the previous commit of a file:
To pick a particular commit view the commit history and run the following:
$ git log
$ git checkout <commit identifier> file.txt
You can also just use the identifier prefix.